What is lengthening the stitch?
Lengthening the stitch is also called extending the stitch and elongating the stitch just to be confusing, not sure why it has three different names but never mind. It is making an extra loop which is dropped on the next row to lengthen the stitch. There are a few ways of lengthening the stitch, but this is the easiest and is less complicated than one I have in a knitting book - thanks to my friend at knitting group for teaching me how to do this so I can share it with you.
How do you lengthen the stitch?
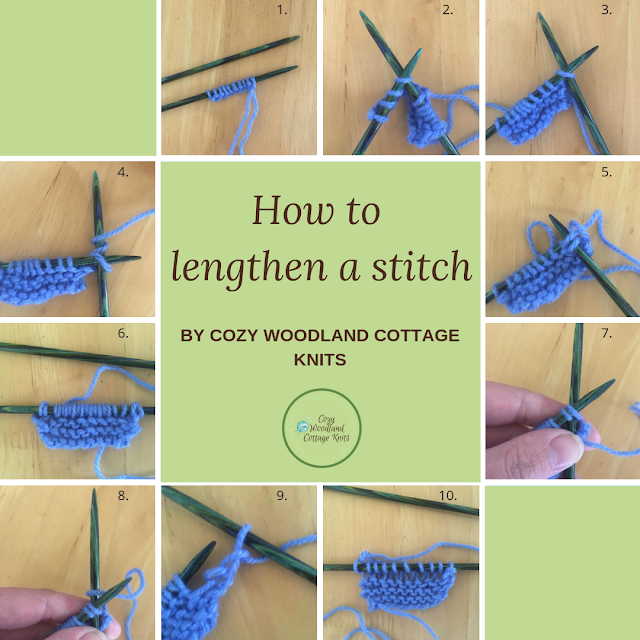
Here is a step by step guide to lengthening the stitch of all of the steps, and below it is all the steps broken down and explained.

1. Cast on your stitches to knit with

2. Knit four rows or how many your pattern states to knit

3. Insert the needle into the first stitch

4. Wrap the yarn around the needle twice, as shown in the photo below

5. Slip the right hand needle down and slide the stitch off, just like you do when you knit.

6. Continue step 3-5 along the rest of the row
7. Knit the next row by inserting the right hand needle into the first loop.

8. Wrap the yarn around the right hand needle and slide the stitch off the needle, letting the 2nd loop drop.

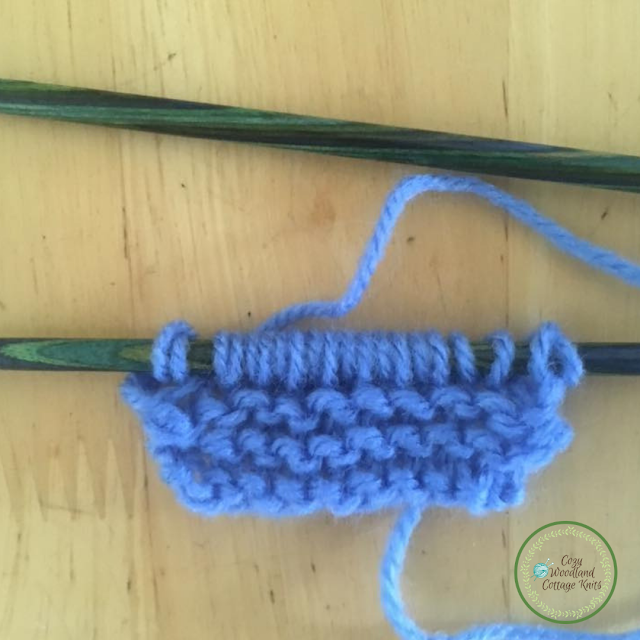
9. Once finished the lengthened stitch should look like the photo below.
10. Continue following step 9 along the row and keep knitting or continue as your pattern states.

Hope you have found this guide on how to lengthen a stitch helpful. If you get stuck or have any questions feel free to email me at arjaye@cozywoodlandcottageknits.com


No comments:
Post a Comment