[Start of image description for image above: A photo of a wooden table with two needles, one has a knitted I-cord on it. At the top of the photo is a white rectangle with the words "knitting tutorial". Underneath is a sage green rectangle with two white stripes and has the words "How to knit an I-cord using double pointed needles and straight needles. At the bottom is the words "cozywoodlandcottageknits.blogspot.com". End of image description.]
What is a I cord?
An I cord is a knitted cord that is similar to a drawstring you can either knit on double pointed needles (DPN's) or on straight needles. It is usually knitted with 4 stitches though you can use more, it creates a cord that can be used for a lot of different projects.
[Start of image description: A photo of a wooden table with two needles, one has a knitted I-cord on it. Underneath is a piece of ripped grid paper with a sage green rectangle, at the top of the rectangle is a white rectangle inside is the words "knitting tutorial". Underneath is the words "two ways to knit an I-cord" and at the bottom is the words "cozywoodlandcottageknits.blogspot.com". End of image description.]
What can you make with an I cord?
There is a few things you can make with an I-cord, I've listed them below and added a few photos of knitting projects I've made using an I-cord .
[Start of image description: A knitted I cord necklace knitted in a variegated yarn of dark blue, light blue and white on a wooden table. End of image description.]
- Drawstrings, cord on a little pouch bag or pants
- Ties on a cardigan or bonnet
- You can use an I cord instead of using ribbon eg. baby booties.
- A toy snail, which is what my children thought I was making when I made the coasters.
- Rugs, place mats
- Coasters
- Bracelets
- Necklaces
- Headbands
- Letters
- A rainbow
A necklace I made by making a long I-cord, sewing up the cast on and off ends together and making two loops with the I-cord.
[Start of image description: A knitted I cord necklace knitted in a variegated yarn of dark blue, light blue and white on a wooden table. End of image description.]
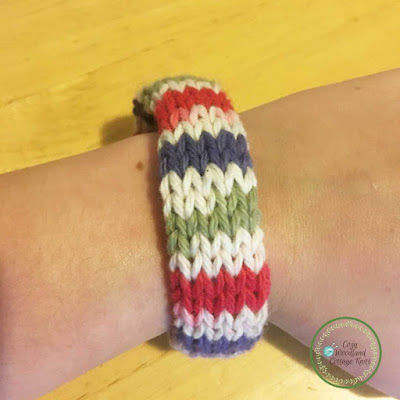
[Start of image description: Two knitted I-cord bracelets knitted in a variegated yarn of light orange, dark orange, brown and cream, light blue and the other I-cord is white and blue they are on a wooden table. End of image description.]
I decided to make some little I-cords and have a go at creating my name. I sewed the I-cords onto the main shape of the letter eg. I did the n for the as the main shape then added a - to make the A here is how it turned out.
[Start of image description: A wooden table with green knitted I-cord letters that make up the word "Arjaye". End of image description.]
How to make an I cord
How to make an I cord using straight needles?
These are great if you want to make an I-cord but don't have double pointed needles. When I first started making and I cord I used straight needles as I didn't have double pointed needles (DPN's).
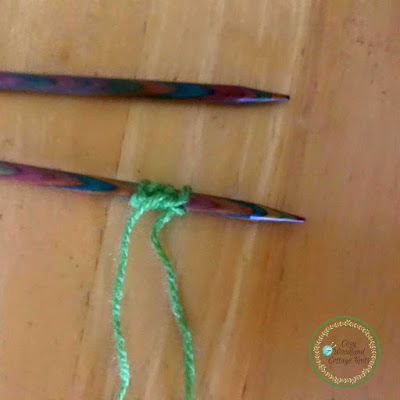
1. Cast on 4 stitches
[Start of image description: a wooden table with a pair of straight knitting needles, one knitting needle has 4 stitches cast on. End of image description.]
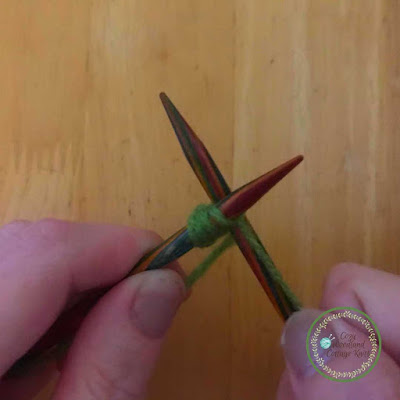
2. * Knit across the row, photo of the row after its been knitted.
[Start of image description: A wooden table with Arjaye's hand resting on it, she is holding a straight knitting needle with stitches on after she had just finished knitting the first row. End of image description.]
3. Slip all of the stitches from the right hand needle back to the left hand needle (if your right handed holding it in your left hand and if your left handed holding it in you right hand). The hand you knit with is the one that doesn't have the knitting stitches on when you cast on to knit.
[Start of image description: A wooden table with Arjaye's hands resting on the wooden table. In her hands is two straight knitting needles and the start of a knitted i-cord. She is slipping the stitches on to the left hand needle and she knits with her right hand. End of image description.]
4.Carry the yarn at the back so that the yarn goes straight across all of the stitches. The yarn is then used to knit the next row.
[Start of image description: Arjaye's hands sitting on a wooden table with her right hand holding the knitting needle with the knitted i-cord on it it. With the other hand she is holding the yarn across the stitches. End of image description.]
[Start of image description: Arjaye's hands resting on the wooden table, in her hands are a pair of straight knitting needles. She is holding the needle with the stitches that need to be knitted in her left hand. In her right hand she is holding the other needle and is holding the yarn tight ready to knit the next stitch. End of image description.]
6. The back of the I cord should look like the photo below, the bit above my fingernail is the yarn you carried at the back.
7. Pull at the bottom where you cast on to tighten the I cord as needed and repeat from * until your I cord is the length you want. Cast off (the same as you do when knitting) and thread in the ends.
[Start of image description: A wooden table with a straight knitting needle with a i-cord on it that still needs to be knitted and finished. End of image description.]
How to make an I cord using double pointed needles (DPN's)?
1.Cast on 4 stitches and *knit across the row
2. Switch needles so the needle you were holding is now in the opposite hand (if you knit with your right hand the stitches will be on the needle in your left hand. If you knit with your left hand the stitches will be on the needle in your right hand).
3. Slide the stitches to the top of the needle by grapping the stitches and pushing them up the needle, so they are ready to knit.
[Start of image description: A wooden table with a pair of double pointed knitting needles. One needle (the same one as above) has had the stitches pushed up the needle to the top and it is now ready to knit the next row. End of image description.]
[Start of image description: A wooden table top with two double pointed knitting needles. One has the knitted i-cord after one row has been knitted, the stitches are at the back of the needle and need to be slid up to the top of the needle. Step three below explains what to do. End of image description.]
3. Slide the stitches to the top of the needle by grapping the stitches and pushing them up the needle, so they are ready to knit.
4. Carry the yarn at the back so that the yarn goes straight across all of the stitches. The yarn is then used to knit the next row.
5. Turn the needle around still holding the yarn, hold the yarn tightly for the first stitch but not so tightly that you can't get the knitting needle into the stitch when you knit it. If your right handed holding it in your left hand and if your left handed holding it in you right hand (so it is in which hand you knit with that usually has the stitches on it when you knit). Mine is the left as I knit right handed.
6. The back of the I cord should look like the photo below, the bit above my fingernail is the yarn you carried at the back.
[Start of image description: a wooden table with a knitted i-cord showing the back of it and what the yarn looks like when carried at the back. You can see the yarn going straight across the back in a straight line, Arjaye's finger is pointing to the yarn at the back. End of image description.]
7. Pull at the bottom where you cast on to tighten the I cord as needed and repeat from * until your I cord is the length you want. Cast off (the same as you do when knitting) and thread in the ends.
[Start of image description: A knitted green I-cord on a wooden table. The I-cord is still on the knitting needle as it is still being knitted. End of image description.]
You can make any size I-cord that you want to create, here is a long one I created to decorate my studio with to create a faerie vine.
[Start of image description: A wooden table with a knitted green I-cord that has been cast off in a pile. It is now ready to use in a project and just needs the ends weaving in. End of image description.]
Free patterns using an i-cord
If you would like to use what you've learnt and make something you here are a few patterns that use an I cord
Free pattern swirly wirly i-cord coaster
Free pattern twisted bonds of friendship bracelets
Little bobble stitch gift bag
Free pattern swirly wirly i-cord coaster
Free pattern twisted bonds of friendship bracelets
Little bobble stitch gift bag
[Start of image description: A knitted dark green swirly wirly I-cord sitting on a wooden table. End of image description.]
Happy knitting, we hope you enjoy knitting your own I-cord and making your own projects using i-cords.
If you love this post please pin
[Start of image description for image above: A photo of a yellow sand stitch square with a garter stitch border around it on a wooden table. Underneath is a sage green rectangle with two white stripes at the top and has a white rectangle with the words "What's that stitch" with the words "Sand stitch" at the bottom is the words "cozy woodland cottage knits .blogspot .com". End of image description.]










No comments:
Post a Comment